Manage Users#
Coiled helps individuals and teams manage their resources, control costs, and collaborate with one another. One way to do this is with workspaces, which are discrete accounts for creating and tracking your clusters. Within a workspace you can:
Configure cloud provider credentials and infrastructure
Define users and permissions
Monitor current and past cluster history
Create and use software environments
View billing and usage
Additionally, if you have many workspaces, you can group them into an organization, similar to how GitHub repositories can be owned by an organization.
Creating workspaces#
When you sign up for Coiled, a workspace is automatically created for you using your username.
In the Professional Tier, you can create additional workspaces, which may help you:
Work with your colleagues using the same cloud resources
Separate work for different projects
Use more than one cloud provider account
Joining a workspace#
Once you accept an invite to a workspace, you can create clusters using the cloud resources and infrastructure that has already been set up. You can see all workspaces of which you are a member from the Coiled web app by selecting the dropdown next to your avatar on the left.
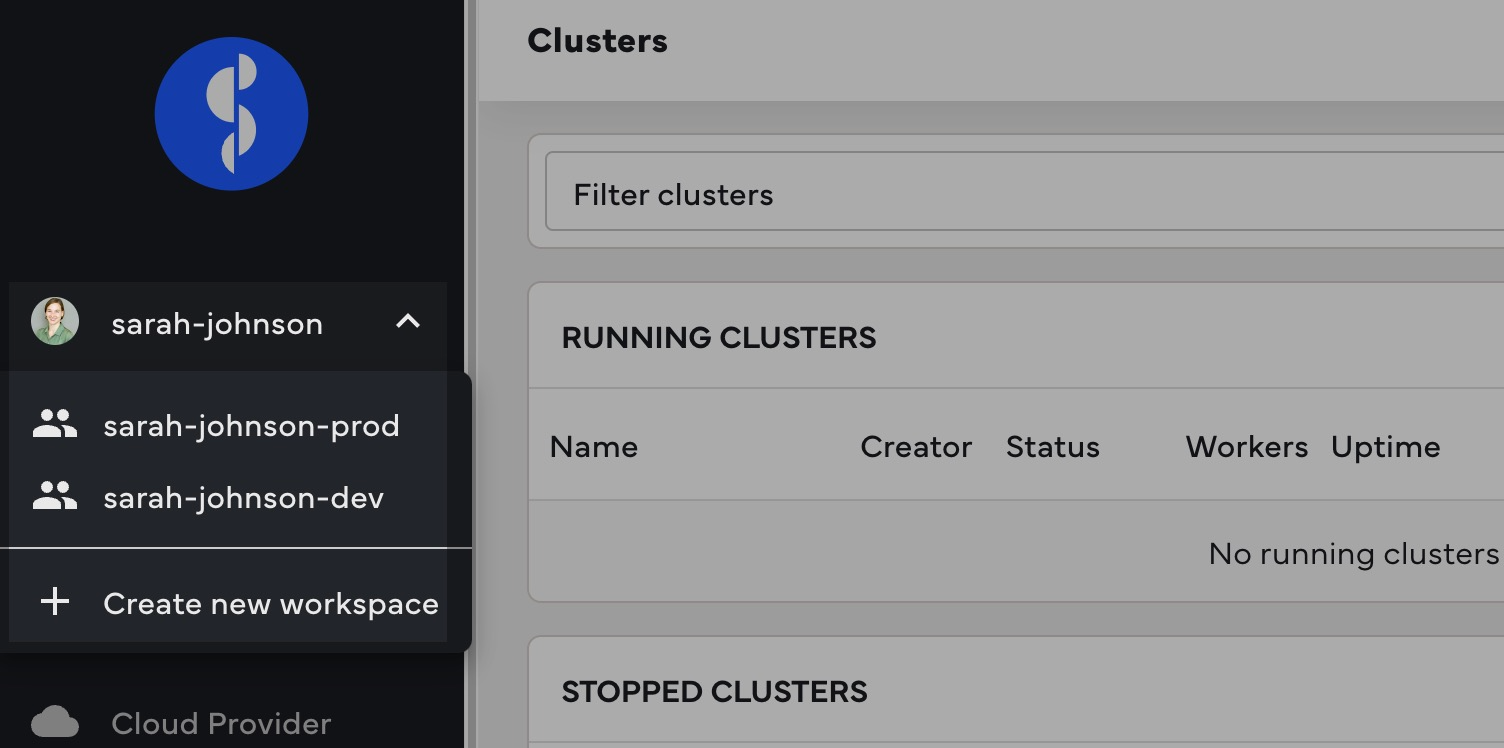
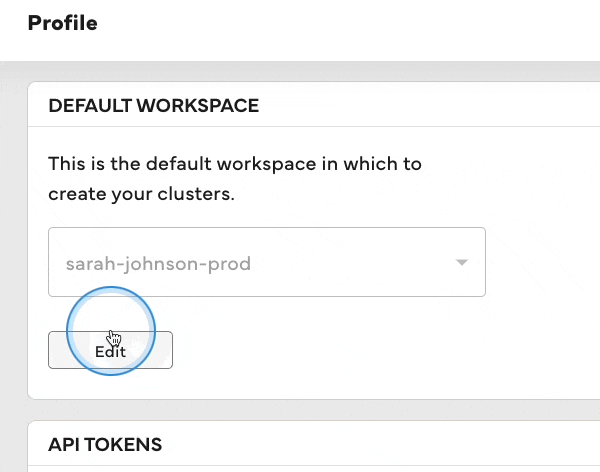
You can set your default workspace from your profile page:
You can also specify the workspace by using the workspace keyword argument commonly accepted in API commands:
import coiled

cluster = coiled.Cluster(n_workers=5, workspace="sarah-johnson-dev")
Note
Members of a workspace can use the cloud provider resources and credentials that have already been configured. Similarly, any tokens you’ve created will work for any workspace to which you belong (there is no need to create a new token).
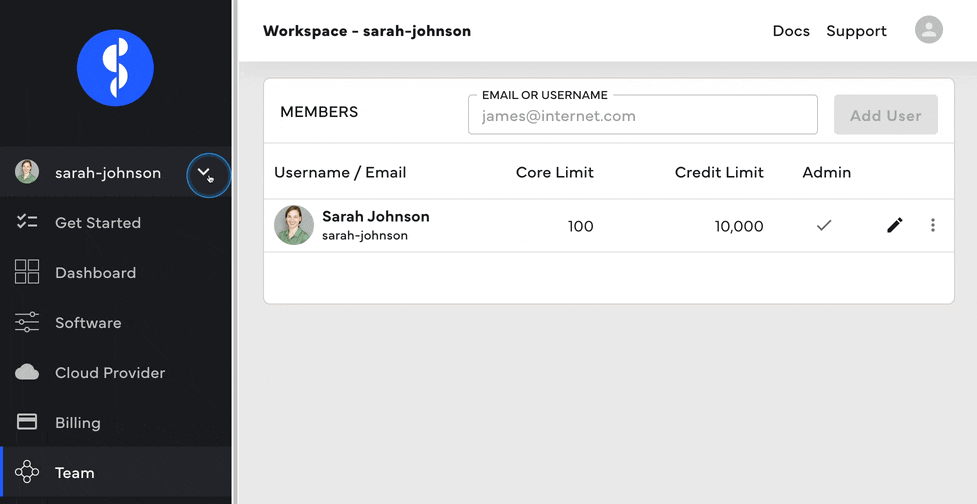
Inviting users to your team#
You can add users from the Team tab in the Coiled web application. You can enter their Coiled username or email in the upper right and then select “Add User”. The invitee will then receive an email notification with a magic link to log in, or sign up, and join your team.
Note
In the Essentials Tier, your organization will be limited to three members. See our pricing information.
Organizations#
You can group workspaces into an organization, similar to how GitHub repositories can be owned by an organization. This consolidates billing across workspaces and makes it easier to view clusters and usage across all of your workspaces.
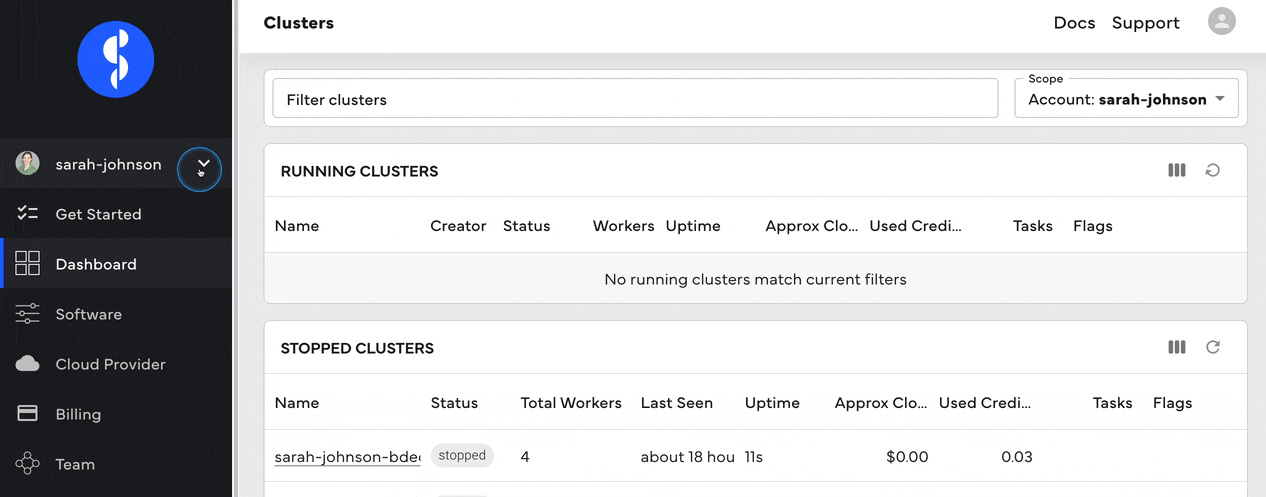
On either the usage page or the clusters list dashboard, you can select a single workspace, or all workspaces in an organization, with the drop-down in the upper right corner of the Coiled UI.
For now, moving workspaces between organizations can only be done by Coiled staff, so let us know if you have a workspace that should be grouped under a different organization.
Permissions#
When you add a user to your team, you can choose either the “Member” role or the “Admin” role.
Members will be able to:
view usage statistics for all team members
view clusters & software environments for all team members
launch clusters
run code on existing clusters launched by other team members (which would let them access data related to other team members’ computations)
Admins will have those permissions, and can also:
specify usage and spend limits for the team
specify usage and spend limits for other users
configure the cloud provider settings (e.g. which cloud provider account to use) for the team
Tracking usage#
You can use Coiled to see usage for users, workspaces, or an organization from the usage page. For more detailed tracking of your Coiled and cloud provider usage and costs, you can use custom Tags.
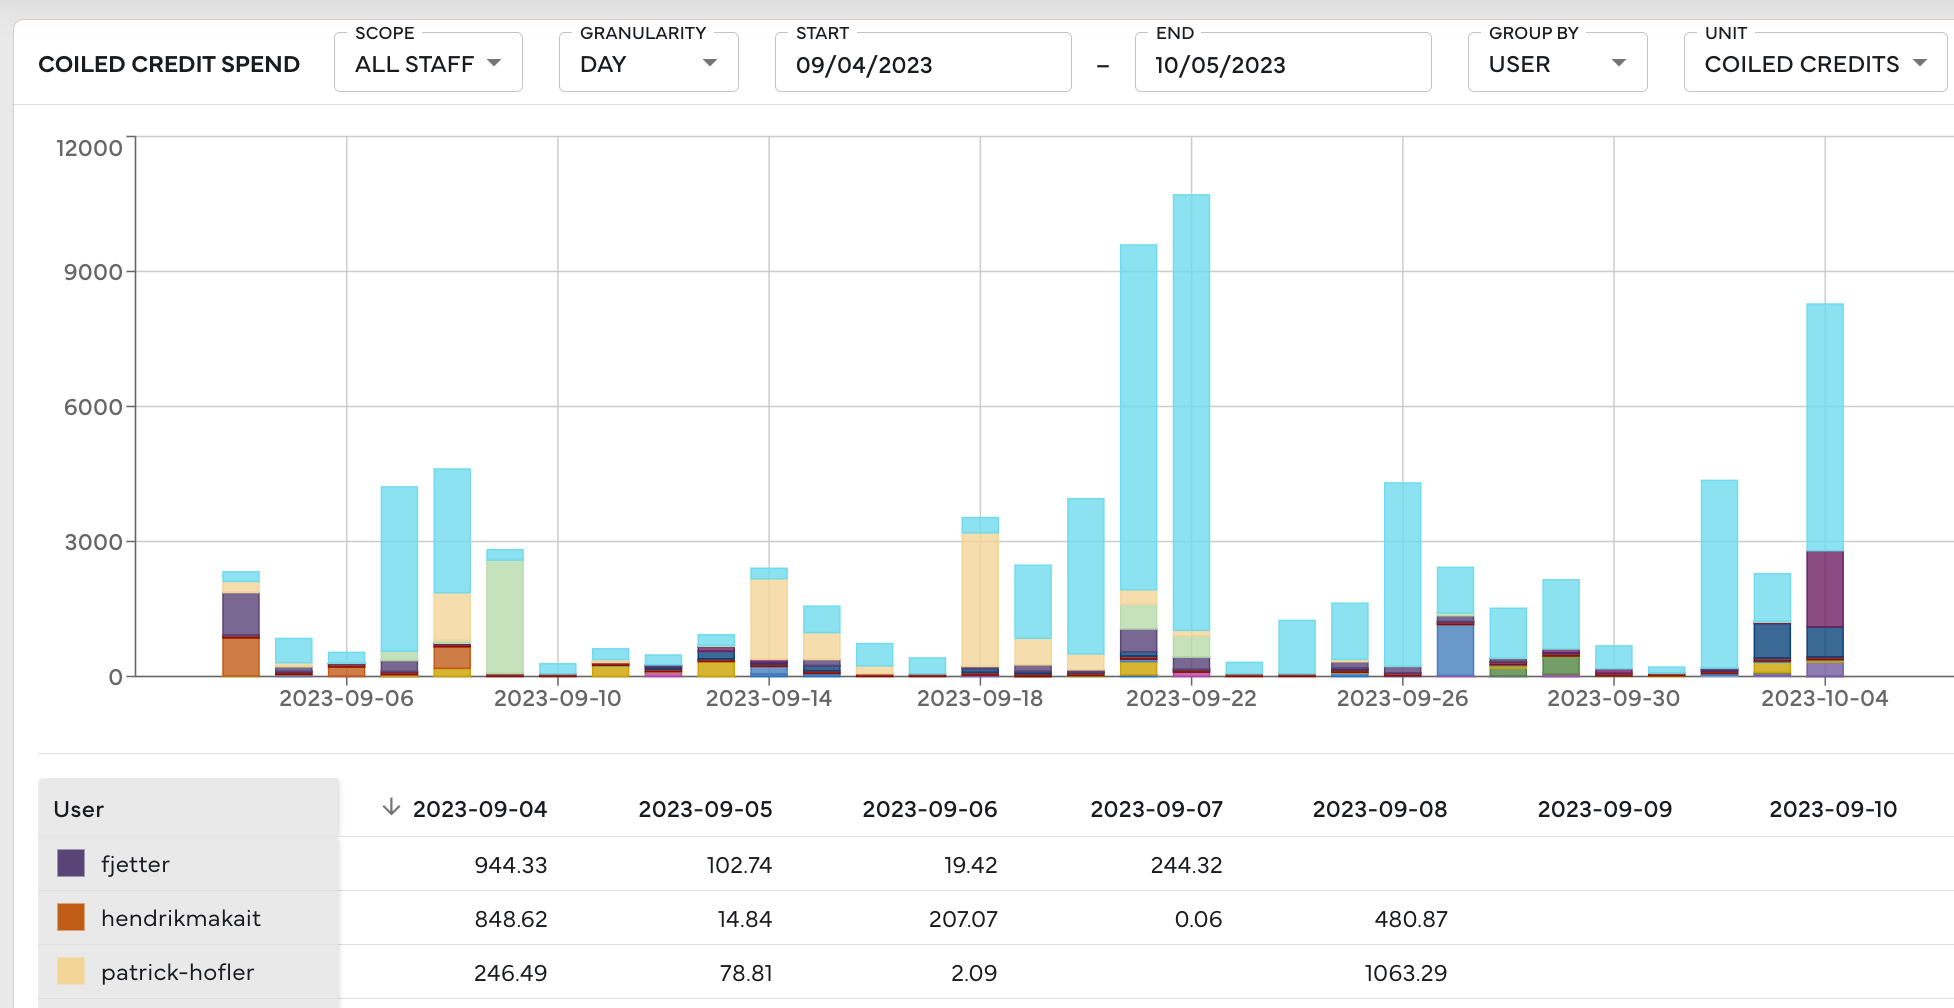
Additionally, Coiled workspace admins can see detailed Coiled usage including your credit balance, credits used, and percentage of free credits used.
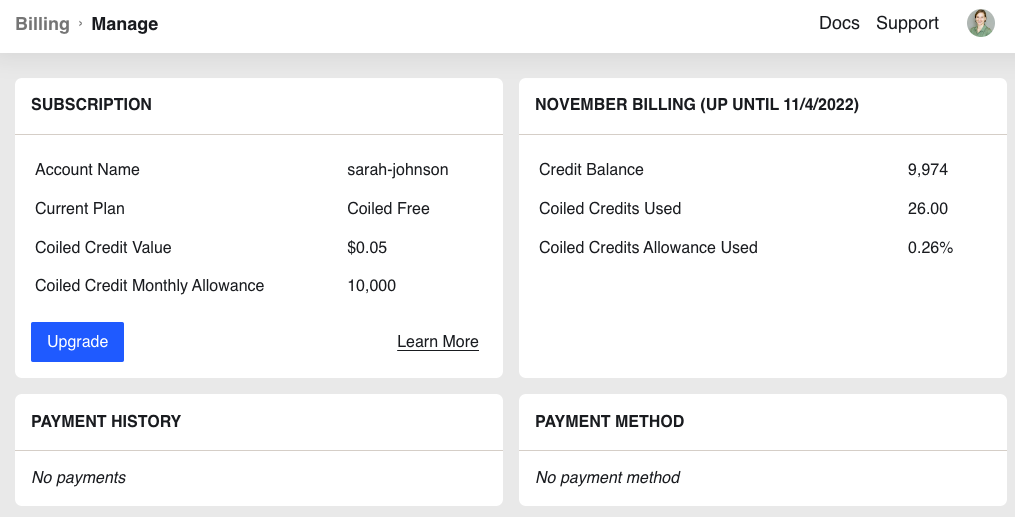
If you have added a credit card for Coiled billing, you will also have visibility into your Coiled bill for the month:
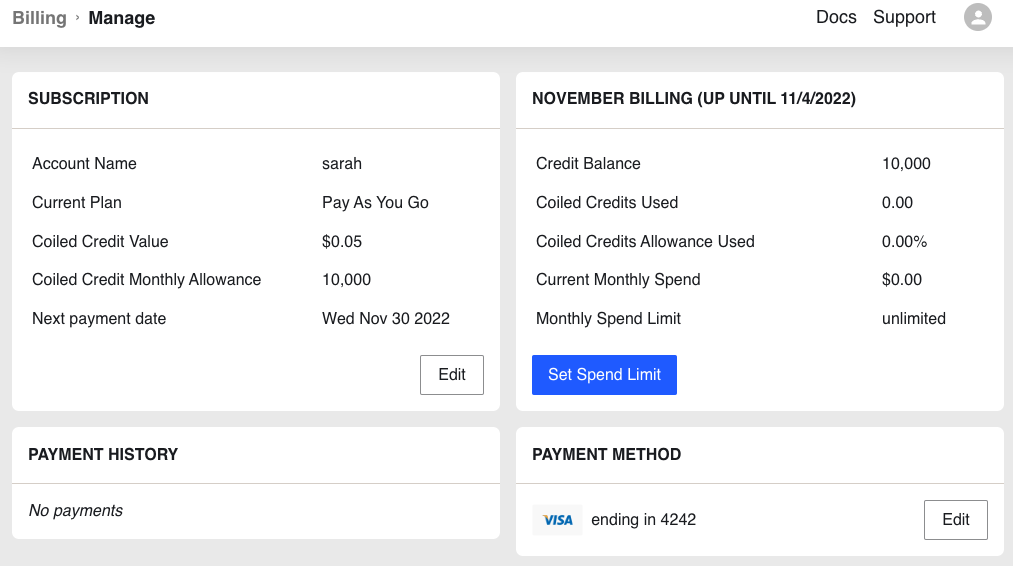
If your usage stays below the amount of free credits, then this value will always show $0 since you don’t have to pay Coiled anything.
Managing resources#
Administrators can set resource limits for team members including:
Coiled credits You can limit the number of Coiled credits used each month for each user or for a team from the Team tab. You can, for example, limit your team to spending 2,000 Coiled credits per month to better control AWS costs.
Team-level vCPUs The number of virtual CPUs that can be running for a team at a given time. If you’d like to change this setting, please reach out to us at support@coiled.io.
User-level vCPUs The number of virtual CPUs that can be running in a user’s workspace at a given time. You can set this limit for any user on your team from the Team tab.