Manual Setup#
Important
We recommend using the command-line setup option. If this option does not work for you, then continue with the steps below.
In this guide you will configure Coiled to run Dask computations entirely within your own GCP account. You will first create a service account from your Google Cloud account then configure your Coiled cloud account to use your Google Cloud account.
Before you start#
This guide assumes you have created your Coiled account and have a Google Cloud account (if not, you can sign up for Google Cloud’s Free Tier).
You should also make sure you have installed coiled (ie, pip install coiled) and the gcloud CLI.
Create a cluster service account#
Coiled requires a limited set of IAM permissions to provision infrastructure and compute resources in your GCP account. You’ll first create a cluster service account with an IAM role granting Coiled these permissions.
1. Sign in to the console#
If this is your first time using gcloud on your machine, you’ll need to authenticate:
gcloud auth login
2. Enable required services#
You will also need the following APIs enabled:
Compute Engine
BigQuery
Cloud Logging
Cloud Monitoring
You can enable them using the gcloud CLI:
gcloud services enable compute
gcloud services enable bigquery.googleapis.com
gcloud services enable logging
gcloud services enable monitoring
Note
Some of these APIs may already be enabled. If not, it may take a few minutes for them to become active in your Google Cloud account.
3. Create IAM roles#
You’ll first export the coiled-role.yaml file with the necessary permissions. You can use the coiled setup gcp CLI tool:
# exports the coiled-role.yaml file you'll use in the next line
coiled setup gcp --export role
Example IAM role for cluster service account
title: coiled
description: coiled-externally-hosted
stage: GA
includedPermissions:
- bigquery.datasets.create
- bigquery.jobs.create
- bigquery.datasets.get
- bigquery.datasets.update
- bigquery.tables.getData
- compute.acceleratorTypes.list
- compute.addresses.list
- compute.disks.create
- compute.disks.delete
- compute.disks.list
- compute.disks.useReadOnly
- compute.firewalls.create
- compute.firewalls.delete
- compute.firewalls.get
- compute.firewalls.list
- compute.globalOperations.get
- compute.globalOperations.getIamPolicy
- compute.globalOperations.list
- compute.images.create
- compute.images.delete
- compute.images.get
- compute.images.list
- compute.images.setLabels
- compute.images.useReadOnly
- compute.instances.create
- compute.instances.delete
- compute.instances.get
- compute.instances.getSerialPortOutput
- compute.instances.list
- compute.instances.setLabels
- compute.instances.setMetadata
- compute.instances.setServiceAccount
- compute.instances.setTags
- compute.instanceTemplates.create
- compute.instanceTemplates.delete
- compute.instanceTemplates.get
- compute.instanceTemplates.useReadOnly
- compute.machineTypes.get
- compute.machineTypes.list
- compute.networks.create
- compute.networks.delete
- compute.networks.get
- compute.networks.list
- compute.networks.updatePolicy
- compute.projects.get
- compute.projects.setCommonInstanceMetadata
- compute.regionOperations.get
- compute.regionOperations.list
- compute.regions.get
- compute.regions.list
- compute.routers.create
- compute.routers.delete
- compute.routers.get
- compute.routers.list
- compute.routers.update
- compute.routes.delete
- compute.routes.list
- compute.subnetworks.create
- compute.subnetworks.delete
- compute.subnetworks.get
- compute.subnetworks.getIamPolicy
- compute.subnetworks.list
- compute.subnetworks.use
- compute.subnetworks.useExternalIp
- compute.zoneOperations.get
- compute.zoneOperations.list
- compute.zones.list
- iam.serviceAccounts.actAs
- logging.buckets.create
- logging.buckets.get
- logging.buckets.list
- logging.logEntries.create
- logging.logEntries.list
- logging.sinks.create
- logging.sinks.get
- logging.sinks.list
- storage.buckets.create
- storage.buckets.get
- storage.objects.create
- storage.objects.get
- storage.objects.list
- storage.objects.update
Then, you can create the necessary IAM roles and bind them to a cluster service account. Note, you’ll need to replace my-project-id with your project ID
# replace my-project-id with your Google Cloud project ID
gcloud iam roles create coiled --project my-project-id --file=coiled-role.yaml

gcloud iam service-accounts create coiled

# replace my-project-id with your Google Cloud project ID
gcloud projects add-iam-policy-binding my-project-id \
  --member=serviceAccount:coiled@my-project-id.iam.gserviceaccount.com
  --role=projects/my-project-id/roles/coiled
Lastly, export the service account key as a JSON file. You’ll need to provide this key to Coiled in a later step (see Configure your Coiled cloud account)
# replace my-project-id with your Google Cloud project ID
gcloud iam service-accounts keys create coiled-key.json \
  --iam-account coiled@my-project-id.iam.gserviceaccount.com
The key will be saved to your local machine wherever you are running gcloud with a file name like coiled-key.json with contents similar to:
{
  "type": "service_account",
  "project_id": "project-id",
  "private_key_id": "25a2715d43525970fe7c05529f03e44a9e6488b3",
  "private_key": "-----BEGIN PRIVATE KEY-----\nMIIEvQIBADANBgkqhki...asSSS5J4526eqmrkb1OA=\n-----END PRIVATE KEY-----\n",
  "client_email": "service-account-name@project-name.iam.gserviceaccount.com",
  "client_id": "102238688522576776582",
  "auth_uri": "https://accounts.google.com/o/oauth2/auth",
  "token_uri": "https://oauth2.googleapis.com/token",
  "auth_provider_x509_cert_url": "https://www.googleapis.com/oauth2/v1/certs",
  "client_x509_cert_url": "https://www.googleapis.com/robot/v1/metadata/x509/service-account-name%40project-name.iam.gserviceaccount.com"
}
Optional: Create a data access service account#
Coiled uses the cluster service account you just created to create clusters and any necessary infrastructure, which requires a number of permissions including network-related resources, firewall-related resources, and access to Cloud Storage. Therefore, it is recommended you create a second service account for data access with more limited permissions to only access the resources you need while running your computation (e.g. BigQuery, Cloud Storage buckets).
You’ll follow the same steps as above. First, export the coiled-data-role.yaml file with the necessary permissions
# exports the coiled-data-role.yaml file you'll use in next line
coiled setup gcp --export data-role
Example IAM role for data access service account
title: coiled-data
description: coiled-externally-hosted
stage: GA
includedPermissions:
- logging.logEntries.create
- storage.buckets.get
- storage.buckets.create
- storage.objects.create
- storage.objects.get
- storage.objects.list
- storage.objects.update
Then, you can create the necessary IAM roles and bind them to the data service account, replacing the project ID with your Google Cloud project ID
# replace my-project-id with your Google Cloud project ID
gcloud iam roles create coiled_data --project my-project-id --file=coiled-data-role.yaml

gcloud iam service-accounts create coiled-data

# replace my-project-id with your Google Cloud project ID
gcloud projects add-iam-policy-binding my-project-id /
  --member=serviceAccount:coiled-data@my-project-id.iam.gserviceaccount.com /
  --role=projects/my-project-id/roles/coiled_data
In a later step when you connect Coiled to your Google Cloud account, you can provide the URI of this service account for data access, replacing my-project-id with your Google Cloud project: coiled-data@my-project-id.iam.gserviceaccount.com.
4. Google Artifact Registry#
You can choose whether to store Coiled software environments in your Google Artifact Registry (GAR) (the default option) or in Docker Hub. To use GAR, you’ll enable the API and then provide Coiled limited access.
Note
Using this configuration, Coiled will not have access to any other repositories in your GCP account, and Coiled does not require admin-level permissions to enable APIs or create repositories.
Enable GAR
gcloud services enable artifactregistry.googleapis.com
Then, grant Coiled access, replacing us-east1 with the region you plan to use for Coiled
gcloud artifacts repositories create coiled --repository-format=docker --location=us-east1

# replace my-project-id with your project ID
gcloud artifacts repositories add-iam-policy-binding coiled --location=us-east1 /
  --member=serviceAccount:coiled@my-project-id.iam.gserviceaccount.com /
  --role=roles/artifactregistry.repoAdmin
It can take a few minutes for the policy binding to propagate. Keep this in mind if in the next step you get a GAR-related error.
Configure your Coiled cloud account#
Now you’re ready to configure the cloud backend in your Coiled cloud account to use your Google Cloud account.
1. Log in to your Coiled account#
First, log in to your Coiled account.
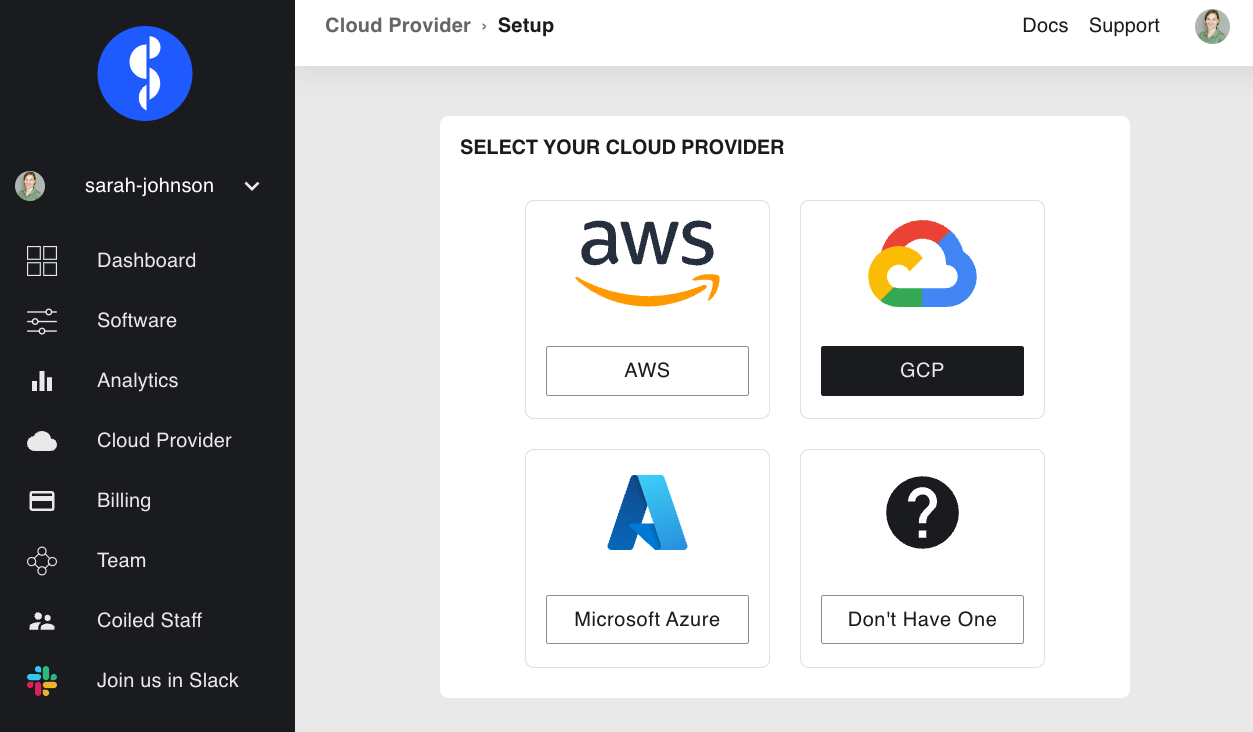
In the navigation bar on the left, select Cloud Provider. Select
GCP:
Note
You can configure a different cloud backend for each Coiled account (i.e., your personal/default account or your team account). Be sure that you’re configuring the correct account by switching accounts at the top of the left navigation bar in your Coiled dashboard if needed.
2. Select your preferred setup flow#
On the Select your preferred flow step, select Custom network configuration and select Next:

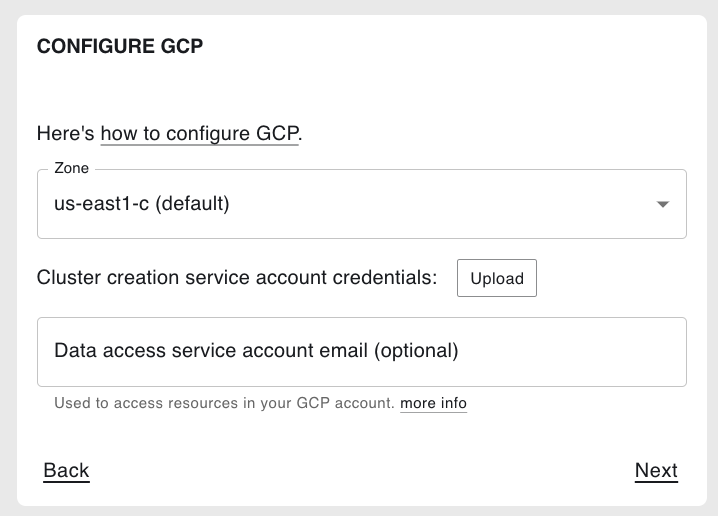
3. Configure GCP#
On the Configure GCP step, select the zone you want to use by default (i.e., when a zone is not specified in the Coiled Python client).
Then, upload the coiled-key.json file (the cluster service account key you exported in a previous step).
Optionally, if you created an data access service account, enter the URI. This should be something like coiled-data@my-project-id.iam.gserviceaccount.com, replacing my-project-id with your Google Cloud project ID.
Then select Next.
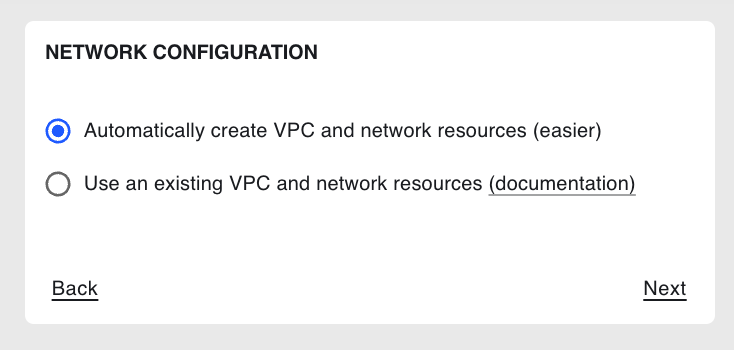
4. Network configuration#
On the Network Configuration step, select whether you would like
Coiled to automatically create new (most common) or manually use existing VPC and network resources
(see Bring Your Own Network):
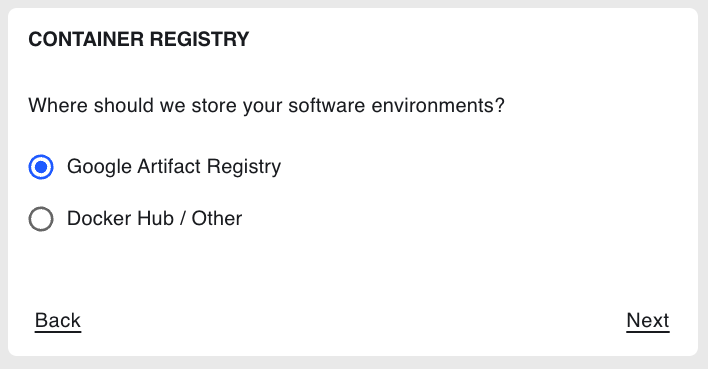
5. Container registry#
On the Container Registry step, select whether you want to store Coiled
software environments in Google Artifact Registry (GAR), the default option,
or Docker Hub, then select Next:
6. Review#
Review your cloud backend provider options, then select Submit.
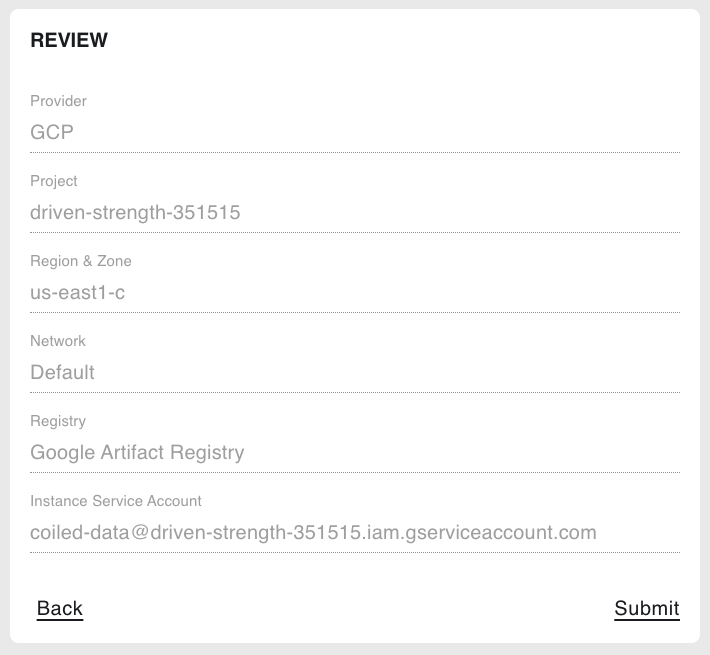
On the next page, you will see the resources provisioned by Coiled in real time.
Next Steps#
Congratulations, Coiled is now configured to use your GCP account! You can now create a Coiled cluster and run a computation.
See the GCP Reference for a more detailed description and additional configuration options.