Manual Setup#
Important
We recommend using the AWS command-line setup option. If this option does not work for you, then continue with the steps below to use the AWS console.
In this guide you will use the AWS console to configure Coiled to run Dask computations on your AWS account. You will first create an IAM user from your AWS acccount then configure your Coiled cloud account to use your AWS account.
Before you start#
This guide assumes you have already created your Coiled account and have an AWS account. If you don’t have an AWS account, you can sign up for AWS Free Tier.
Create IAM user#
First, you will create an IAM user in your AWS account. Watch the video below to follow along, then you can configure your Coiled cloud account.
1. Sign in to the Console#
Sign in to the AWS console (see these instructions in the AWS documentation if you’re having trouble).
2. Create IAM policies#
Coiled requires a limited set of IAM permissions to provision infrastructure and compute resources in your AWS account. Follow the steps in the AWS user guide on how to create new IAM policies.
We’ll create two policies, one for initial setup and another for ongoing use.
When you arrive at the step to insert a JSON policy document, copy and paste
the following JSON policy documents. You can name them coiled-setup and coiled-ongoing,
respectively, to make them easy to locate in the next step.
AWS IAM Setup policy document (JSON)
{
    "Statement": [
        {
            "Sid": "Setup",
            "Effect": "Allow",
            "Resource": "*",
            "Action": [
                "ec2:AssociateRouteTable",
                "ec2:AttachInternetGateway",
                "ec2:CreateInternetGateway",
                "ec2:CreateRoute",
                "ec2:CreateRouteTable",
                "ec2:CreateSubnet",
                "ec2:CreateVpc",
                "ec2:DeleteInternetGateway",
                "ec2:DeleteRoute",
                "ec2:DeleteRouteTable",
                "ec2:DeleteSubnet",
                "ec2:DeleteVpc",
                "ec2:DetachInternetGateway",
                "ec2:DisassociateRouteTable",
                "ec2:ModifySubnetAttribute",
                "ec2:ModifyVpcAttribute",
                "iam:AddRoleToInstanceProfile",
                "iam:AttachRolePolicy",
                "iam:CreateInstanceProfile",
                "iam:CreatePolicy",
                "iam:CreateRole",
                "iam:CreateServiceLinkedRole",
                "iam:DeleteRole",
                "iam:GetPolicy",
                "iam:ListAttachedRolePolicies",
                "iam:ListInstanceProfiles",
                "iam:TagInstanceProfile",
                "iam:TagPolicy",
                "iam:TagRole"
            ]
        }
    ],
    "Version": "2012-10-17"
}
AWS IAM Ongoing policy document (JSON)
{
    "Statement": [
        {
            "Sid": "Ongoing",
            "Effect": "Allow",
            "Resource": "*",
            "Action": [
                "ec2:AuthorizeSecurityGroupIngress",
                "ec2:CreateFleet",
                "ec2:CreateLaunchTemplate",
                "ec2:CreateLaunchTemplateVersion",
                "ec2:CreateSecurityGroup",
                "ec2:CreateTags",
                "ec2:DescribeAvailabilityZones",
                "ec2:DescribeImages",
                "ec2:DescribeInstances",
                "ec2:DescribeInstanceTypeOfferings",
                "ec2:DescribeInstanceTypes",
                "ec2:DescribeInternetGateways",
                "ec2:DescribeLaunchTemplates",
                "ec2:DescribeRegions",
                "ec2:DescribeRouteTables",
                "ec2:DescribeSecurityGroups",
                "ec2:DescribeSubnets",
                "ec2:DescribeVpcs",
                "ec2:StartInstances",
                "ec2:RunInstances",
                "iam:ListPolicies",
                "logs:CreateLogGroup",
                "logs:CreateLogStream",
                "logs:DescribeLogGroups",
                "logs:DescribeLogStreams",
                "logs:PutLogEvents",
                "logs:PutRetentionPolicy",
                "logs:TagLogGroup",
                "logs:TagResource"
            ]
        },
        {
            "Sid": "OngoingInstanceProfile",
            "Effect": "Allow",
            "Resource": "arn:aws:iam::*:instance-profile/coiled-*",
            "Action": [
                "iam:GetInstanceProfile"
            ]
        },
        {
            "Sid": "OngoingAttachInstancePolicy",
            "Effect": "Allow",
            "Resource": "arn:aws:iam::*:role/coiled-*",
            "Action": [
                "iam:GetRole",
                "iam:PassRole"
            ]
        },
        {
            "Sid": "OngoingDestructive",
            "Effect": "Allow",
            "Resource": "*",
            "Action": [
                "ec2:DeleteFleets",
                "ec2:DeleteLaunchTemplate",
                "ec2:DeleteLaunchTemplateVersions",
                "ec2:DeleteSecurityGroup",
                "ec2:ModifyInstanceAttribute",
                "ec2:StopInstances",
                "ec2:TerminateInstances"
            ],
            "Condition": {
                "StringEquals": {
                    "ec2:ResourceTag/owner": "coiled"
                }
            }
        },
        {
            "Sid": "OptionalLogPull",
            "Effect": "Allow",
            "Resource": "*",
            "Action": [
                "logs:GetLogEvents",
                "logs:FilterLogEvents"
            ]
        },
        {
            "Sid": "OptionalECR",
            "Effect": "Allow",
            "Resource": "*",
            "Action": [
                "ecr:BatchCheckLayerAvailability",
                "ecr:BatchGetImage",
                "ecr:CompleteLayerUpload",
                "ecr:CreateRepository",
                "ecr:DescribeImages",
                "ecr:DescribeRepositories",
                "ecr:GetAuthorizationToken",
                "ecr:GetDownloadUrlForLayer",
                "ecr:GetRepositoryPolicy",
                "ecr:InitiateLayerUpload",
                "ecr:ListImages",
                "ecr:PutImage",
                "ecr:UploadLayerPart",
                "ecr:TagResource"
            ]
        }
    ],
    "Version": "2012-10-17"
}
3. Create a new IAM user#
Follow the steps in the AWS guide on creating a new IAM user. This IAM user must have programmatic access. Creating an IAM role with temporary access keys will not be sufficient.
4. Attach IAM policies#
Now that you have created the two IAM policies with all necessary permissions, you can attach these policies to the IAM user you created in step 2. Follow the steps in the AWS user guide on attaching IAM identity permissions.
5. Obtain AWS credentials#
Coiled provisions resources on your AWS account through the use of AWS security credentials. Select the user you created previously. Follow the steps in the AWS user guide on programmatic access to obtain (or create) your access key ID and secret access key. They will resemble the following:
Example AWS Secret Access ID: AKIAIOSFODNN7EXAMPLE
Example AWS Secret Access Key: wJalrXUtnFEMI/K7MDENG/bPxRfiCYEXAMPLEKEY
Keep these credentials handy since you will configure them in Coiled Cloud in the next step.
Note
The AWS credentials you supply must be long-lived (not temporary) tokens.
Configure your Coiled cloud account#
Now you’re ready to configure the cloud backend in your Coiled workspace to use your AWS account.
Watch the video below to follow along:
1. Log in to Coiled#
First, log in to Coiled.
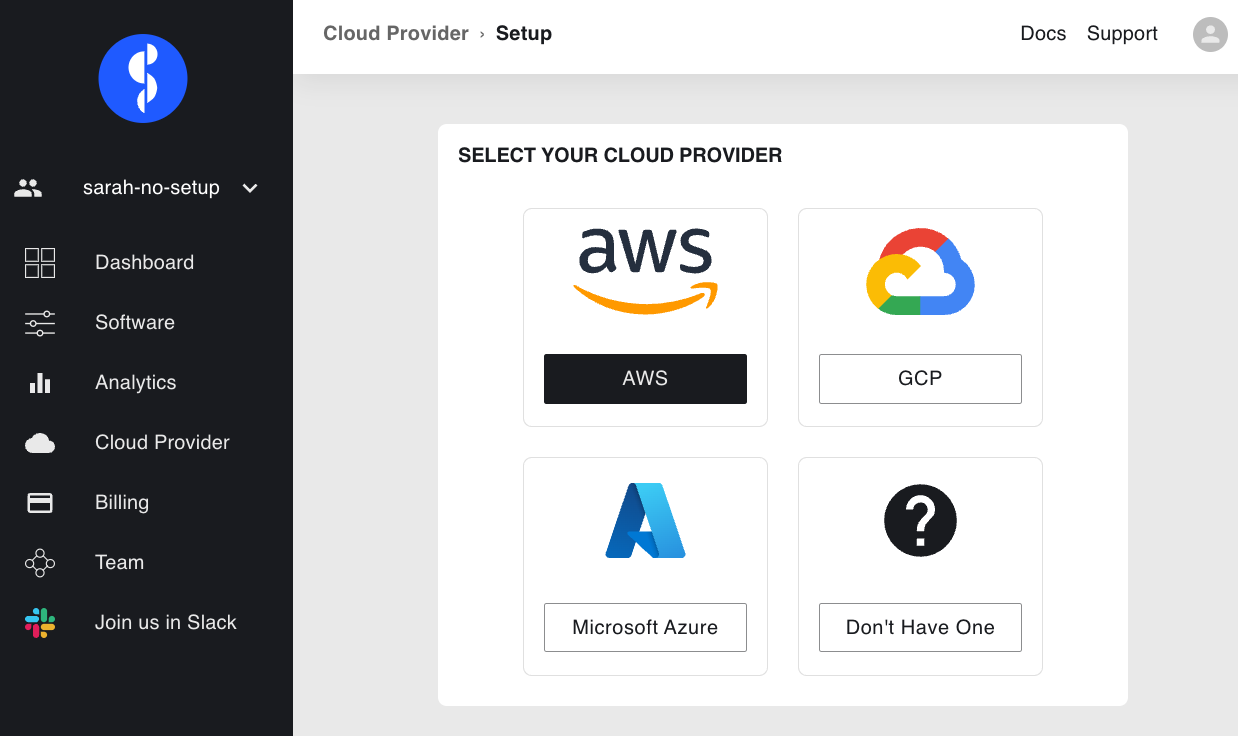
In the navigation bar on the left, select on Cloud Provider. Select
AWS:
Note
You can configure a different cloud backend for each Coiled workspace (i.e., your personal/default workspace or your team account). Be sure that you’re configuring the correct workspace by switching workspace in the menu at the upper right corner of the page.
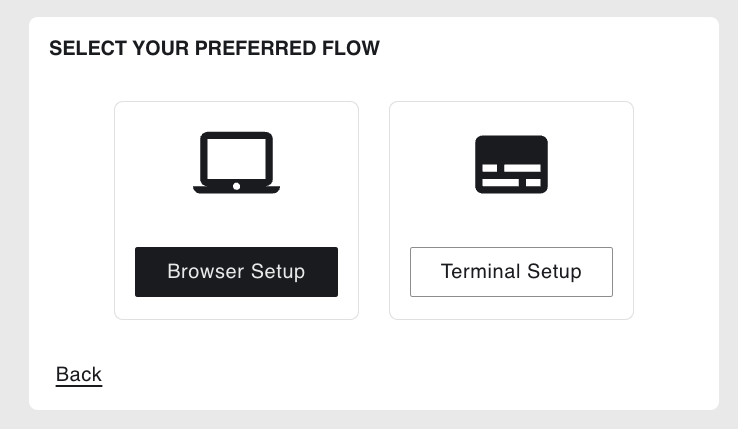
2. Select your preferred setup flow#
On the Select Your Preferred Flow step, select Browser Setup. Selecting Terminal Setup will instead walk you through the instructions for using the AWS command-line setup option.
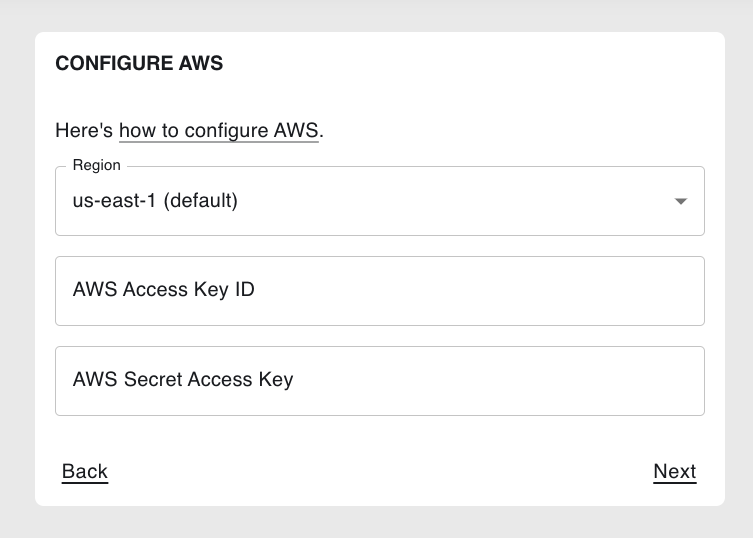
3. Configure AWS#
On the Configure AWS step, select your default AWS region
(i.e., when a region is not specified in the Coiled Python client).
Enter your AWS Access Key ID and AWS Secret Access Key
from the previous step, then click the Next:
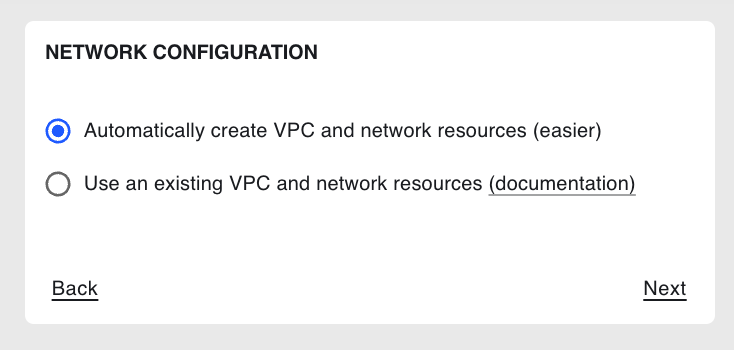
4. Network configuration#
On the Network Configuration step, select whether you would like
Coiled to automatically create new (most common) or manually use existing VPC and network resources
(see Bring Your Own Network):
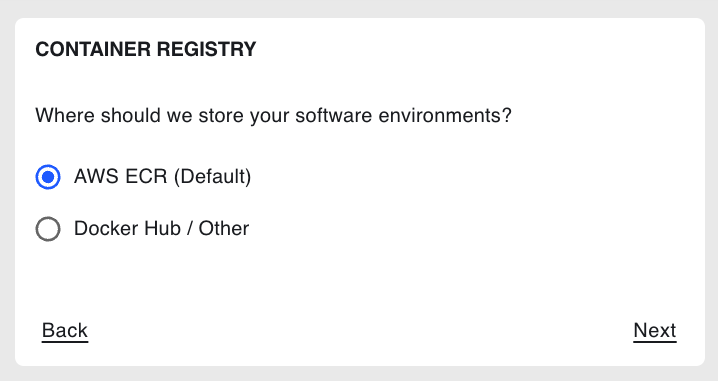
5. Container registry#
On the Container Registry step, select whether you want to store Coiled
software environments in Amazon Elastic Container Registry (ECR), the default option,
or Docker Hub, then select Next:
6. Review#
Review your cloud backend provider options, then select Submit.
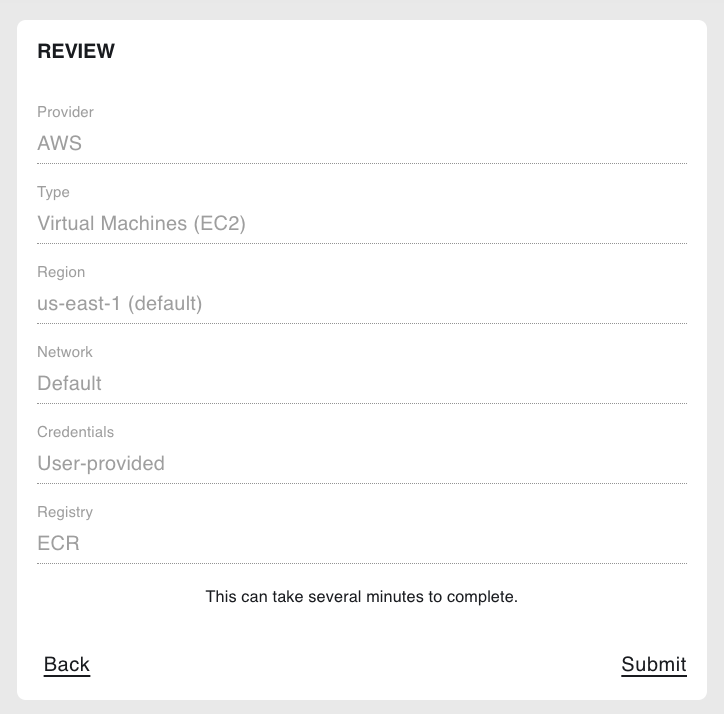
On the next page, you will see the resources provisioned by Coiled in real time.
Next Steps#
Congratulations, Coiled is now configured to use your AWS account! You can now create a Coiled cluster and run a computation.
Note
Now that you have completed these configuration steps, you can
detach the coiled-setup policy to restrict Coiled to only
use the IAM permissions defined in the coiled-ongoing policy.
When you create your first cluster, Coiled will create a new VPC, subnets, AMI, EC2 instances, and other resources on your AWS account that are used to power your Dask clusters. See the AWS Reference for a more detailed description of these resources and additional configuration options.